Connect Your BigCommerce Store
To connect your BigCommerce with eSwap
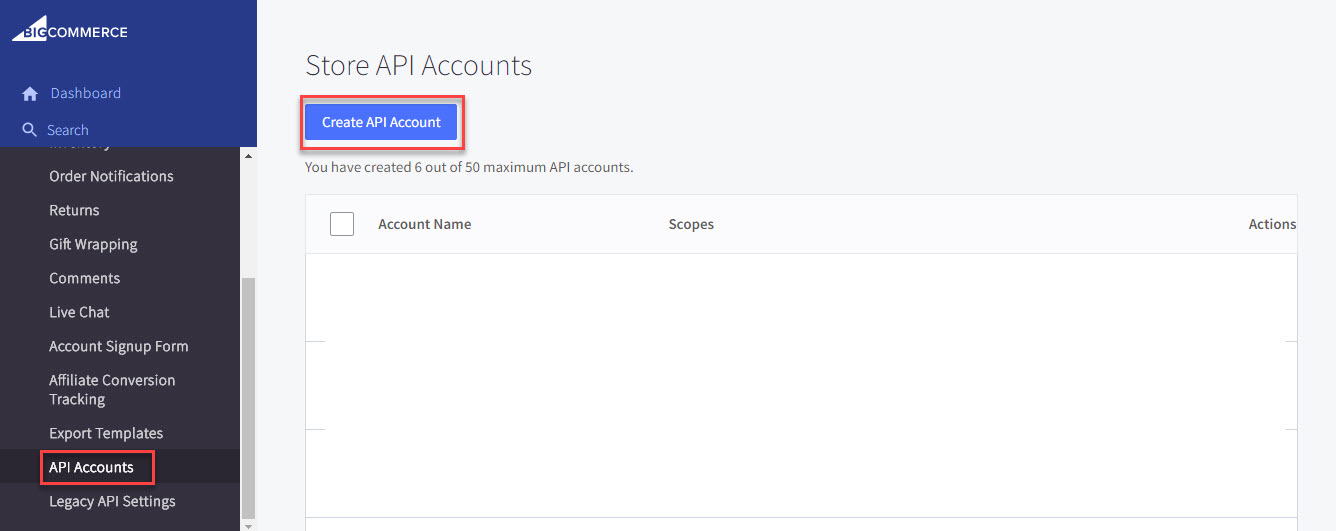
- Log in to your BigCommerce account.
- From the left pane, select “Advanced Settings” > “API Accounts.” This will take you to the Store API Accounts page.
- Click on “Create API Account” to proceed.
- Enter the API account name in the Name textbox and select the required Oauth Scopes.
- Note: The Store HASH information can be found from the API Path textbox. It’s the value between “/stores/” and “/v3/”.
- Click “Save.” This will display the BigCommerce API Credentials page containing the Access Token and Client ID.
- Copy these credentials securely as they will be needed for the integration.
Note: Ensure to save these credentials securely as they may not be accessible again once you close the window.

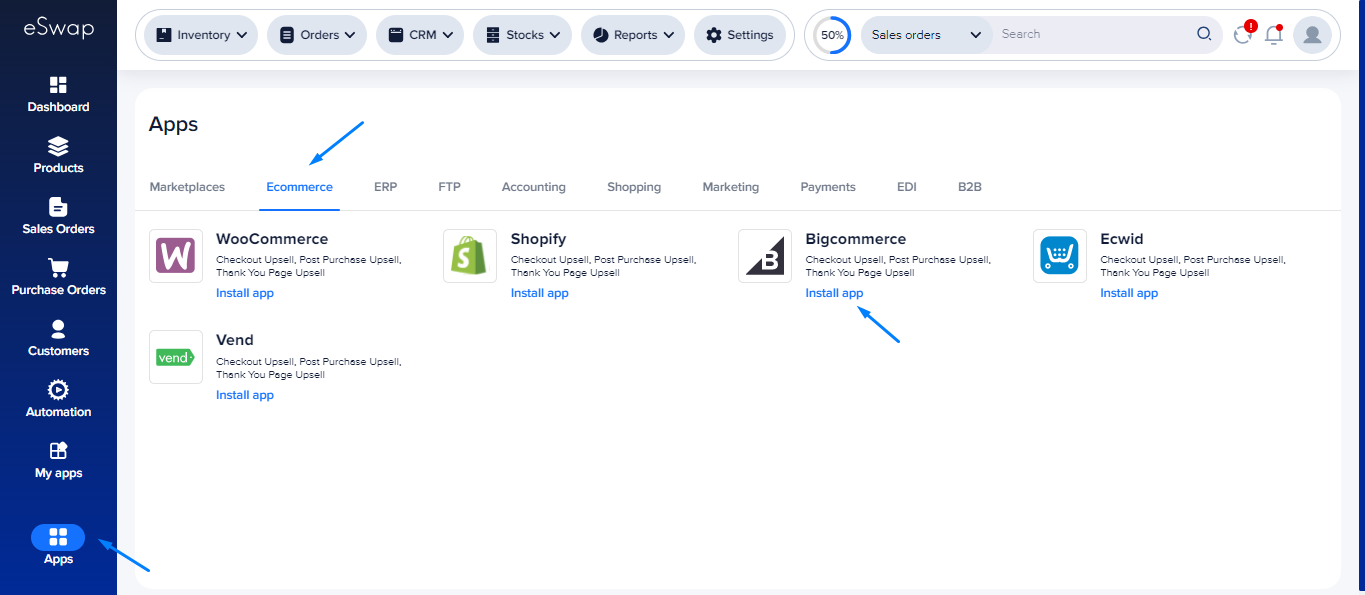
- Navigate to the Apps section in eSwap, particularly under “Ecommerce,” and select “BigCommerce.”
- Click on “Install app.”
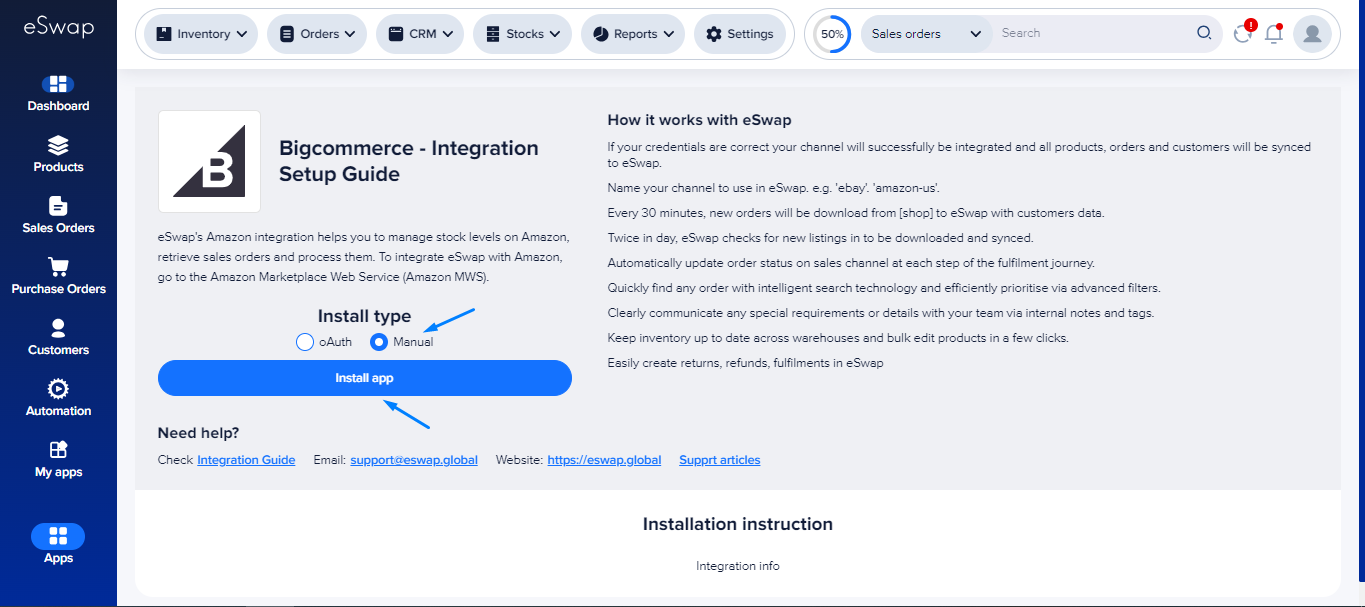
Click on “Install app.”
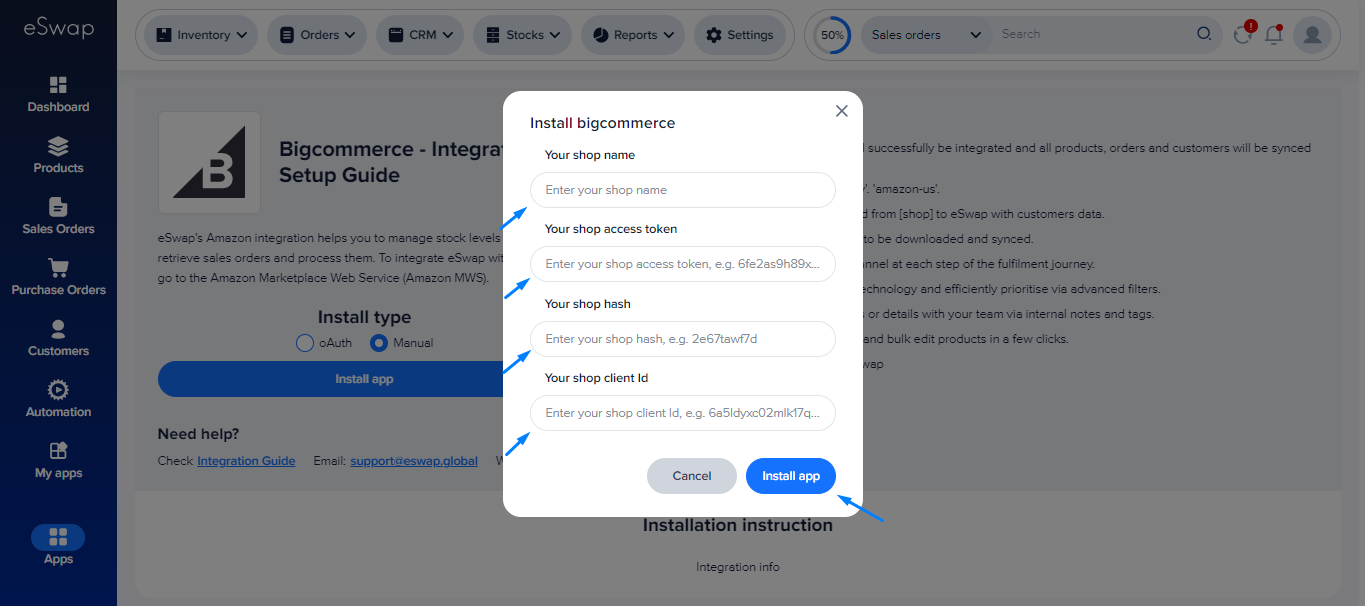
- Enter a desired name for your BigCommerce shop.
- Enroll your shop access token, hash, and client ID obtained from the previous step.
- Click “Install app” to proceed.
Upon installation, follow these configuration steps:
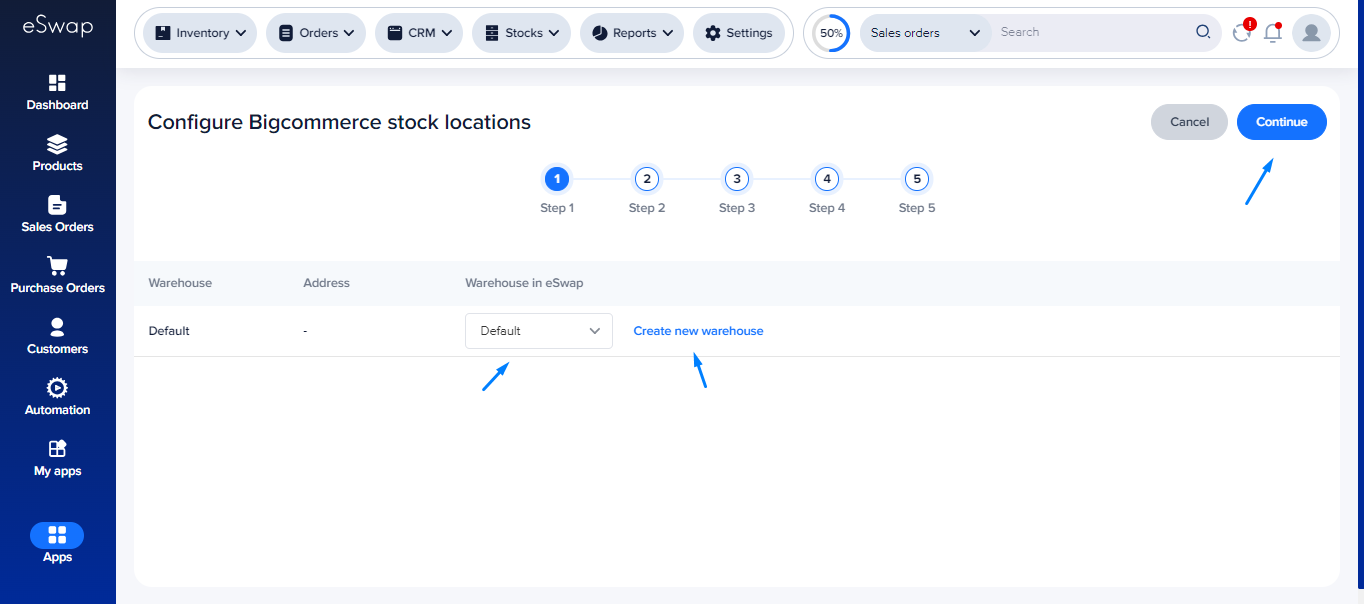
- Choose a warehouse location from existing options or create a new one if necessary.
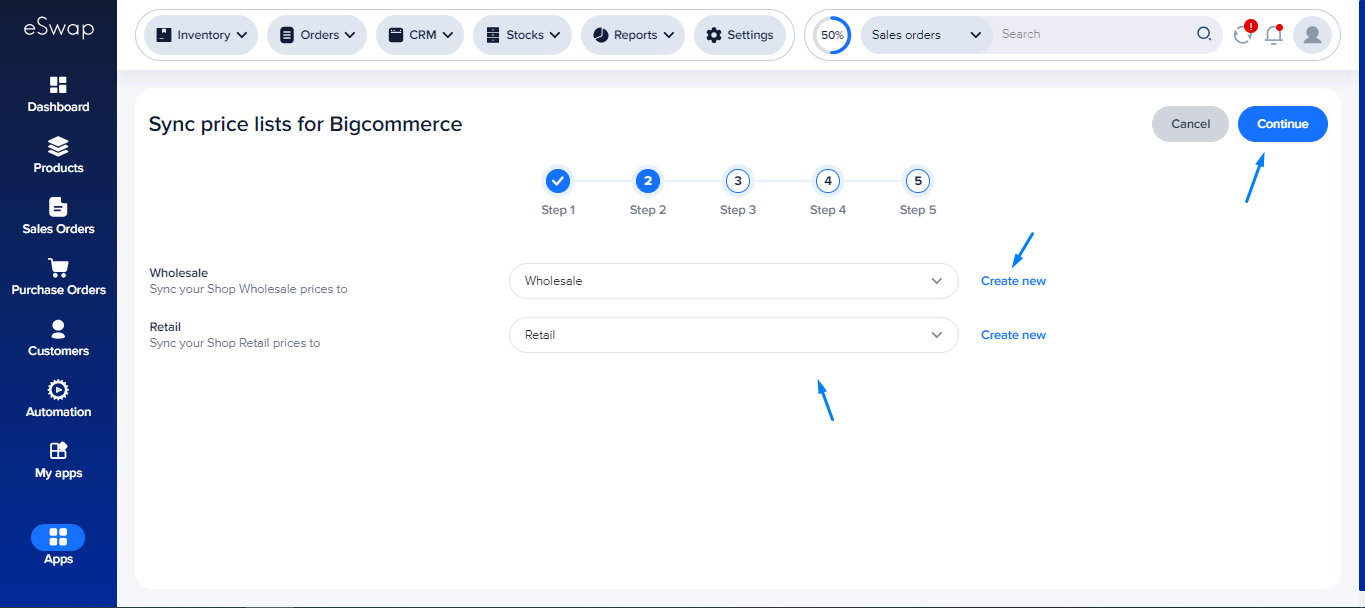
- Sync your price list with BigCommerce or create a new one as required.
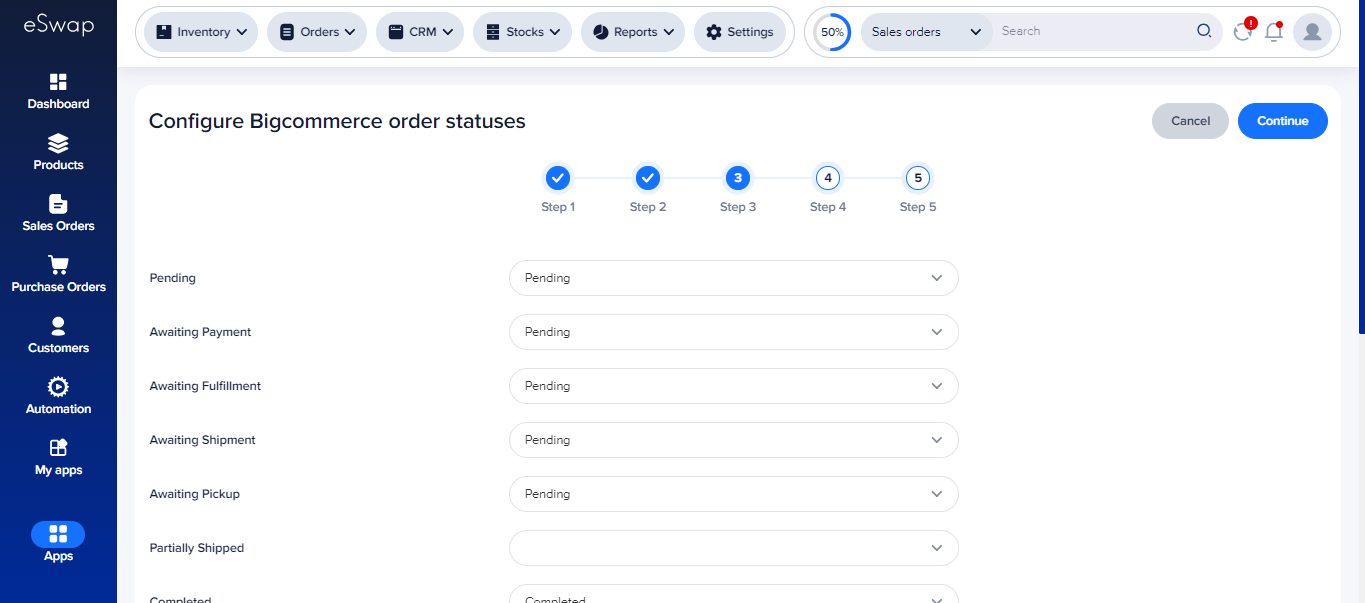
- Configure BigCommerce order statuses to align with existing lines or create new ones if necessary.
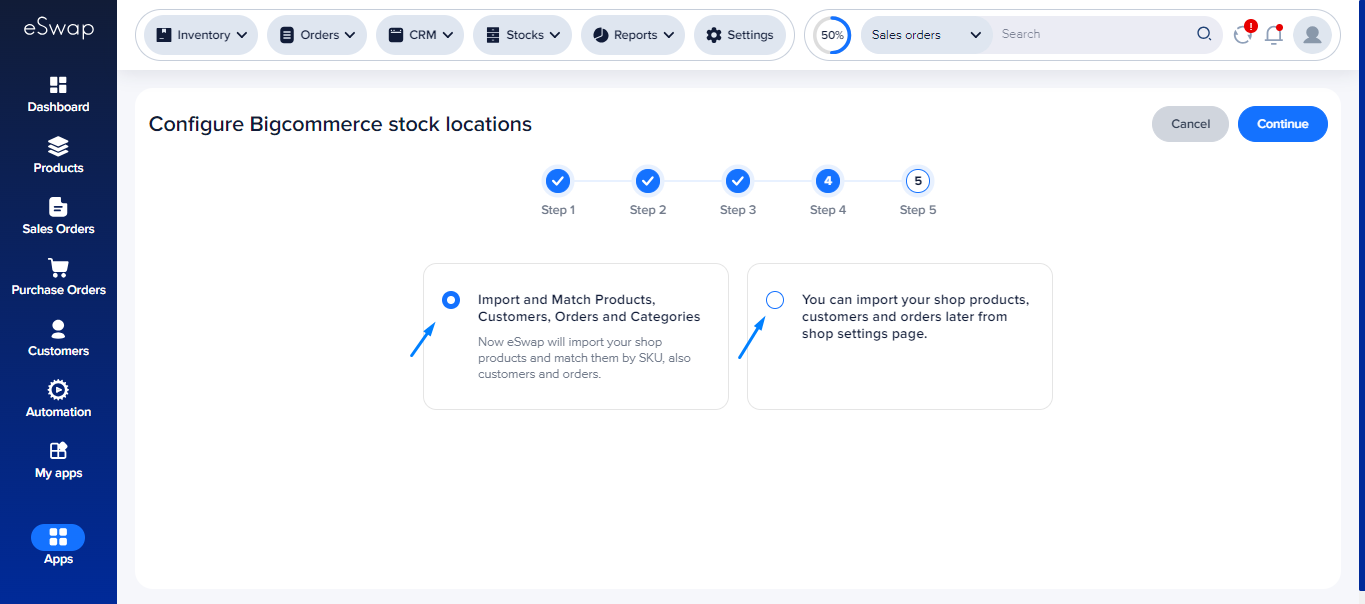
- Decide whether to import data immediately or at a later time.
- The import process will begin based on your selections.
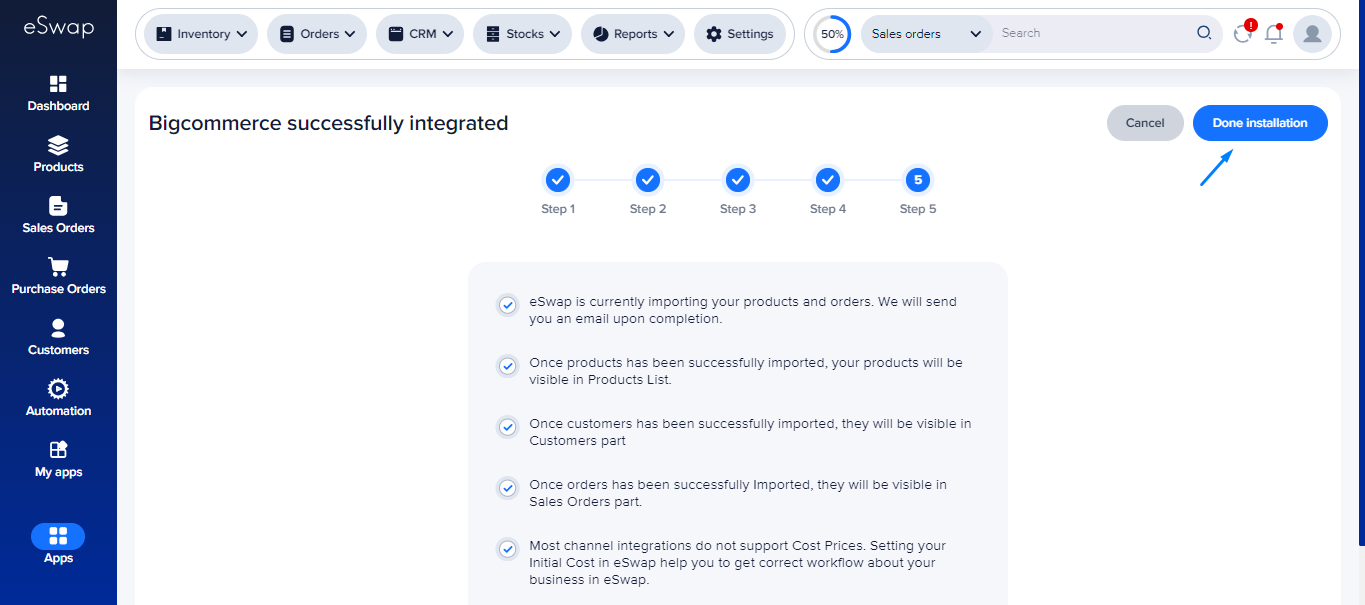
- Once the configuration steps are completed, click “Done Installation” to finalize the setup.
- The BigCommerce app will now be accessible from your apps page within eSwap.
By following these steps, you will successfully connect your BigCommerce account to eSwap, enabling seamless data synchronization and management between the two platforms.