Connect your WooCommerce Account
In eSwap you can connect your WooCommerce account with 2 ways.
- With consumer key and consumer secret keys, which you need to generate in your WooCommerce store.
- Without keys
1. Log in to your WooCommerce store admin panel, go to WooCommerce -> Settings -> Advacnced -> Rest API -> Add Key.
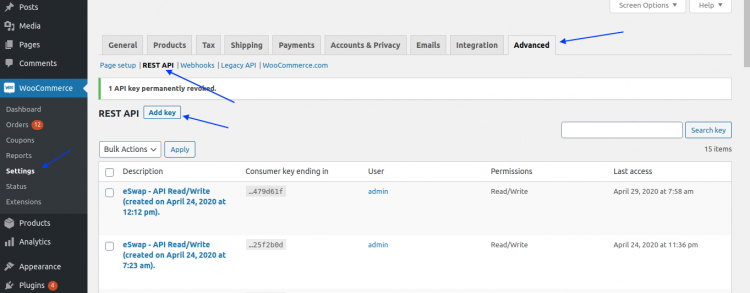
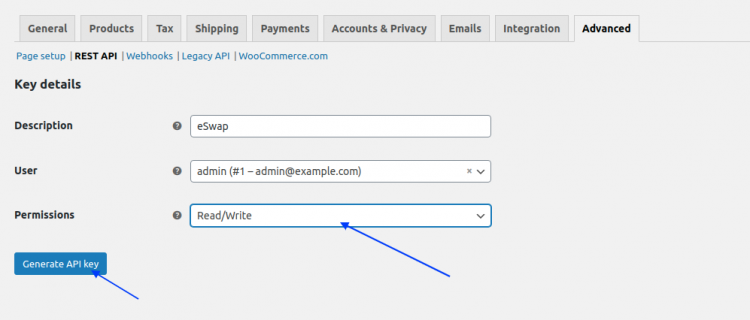
After clicking on the Add key button you’ll be redirected to another page where you need to fill key details and select permission type. To fully use eSwap -> WooCommerce integration you need to select Read/Write access.
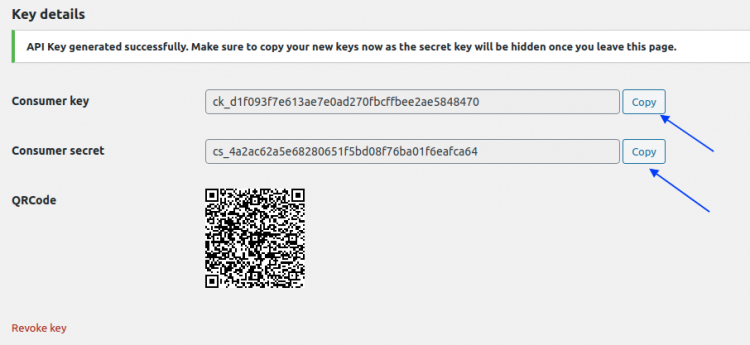
After tapping on the Generate API key button you will see generated Consumer key and secret which you need to copy and past in eSwap.
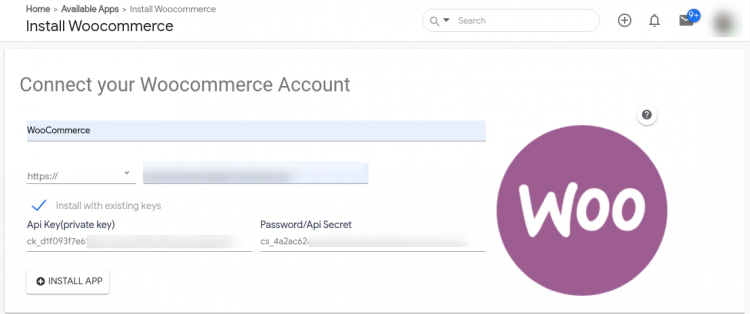
Now go back to your eSwap account, tap on Available apps -> Sales channels -> WooCommerce and click on the Install app button.
- Now fill your shop name(e.g. WooCommerce)
- If your shop has SSL certificate choose https:// if not Http://
- Copy and paste your shop URL(e.g. mytestshop.com)
- Enable checkbox Install with existing keys
- Paste consumer key in API ket input
- Paste Consumer Secret in Password/API secret input
- Click install app
2. Go to your eSwap account, tap on Available apps -> Sales channels -> WooCommerce, and click on the Install app button.
- Fill your shop name
- Set https:// and past your shop URL
- Click Install app
- You’ll be redirected to your WooCommerce store where you need to approve eSwap’s connection to your WooCommerce store.
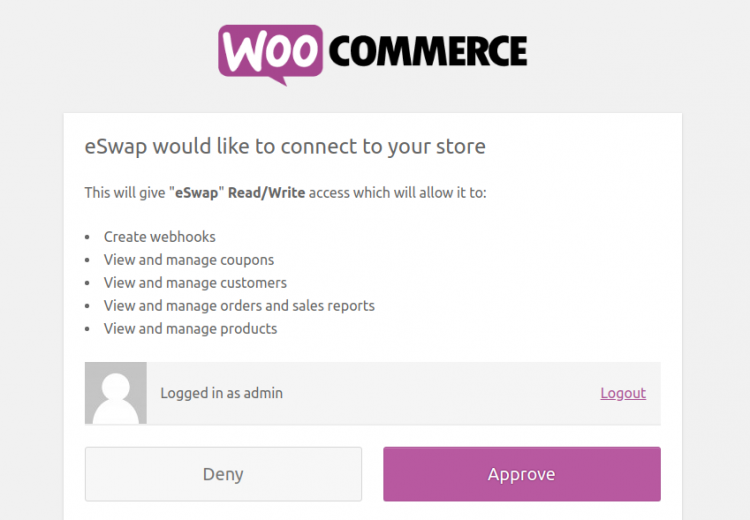
Click Approve.
After connecting your WooCommerce store with one of these ways you need to proceed with the next few steps to complete the installation.
Table of Contents
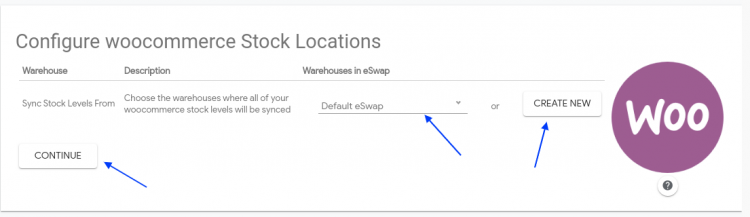
STEP 1
Configure WooCommerce stock locations. Here you need to choose warehouse in eSwap where all of your WooCommerce stock levels will be synced.
You can also create a new warehouse, for your WooCommerce store.
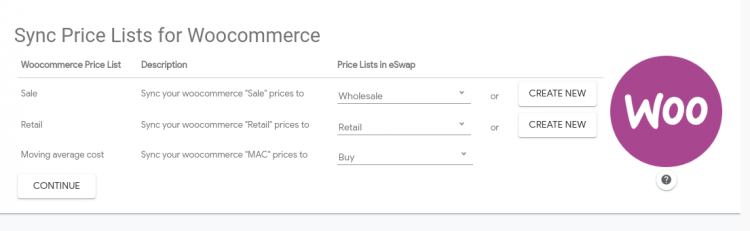
STEP 2
Sync your WooCommerce prices in eSwap’s pricelists or create a new one for each price.
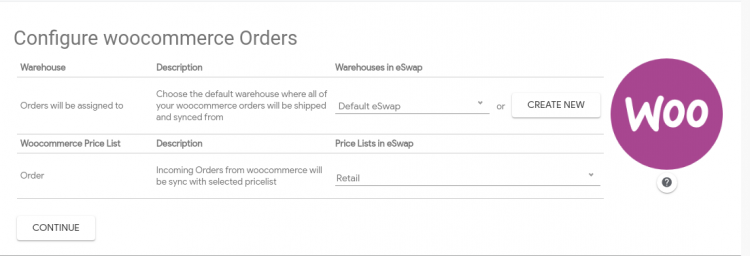
STEP 3
On this step, you need to choose the default warehouse where all of your WooCommerce orders will be shipped and synced from and from which price list incoming orders will be synced.
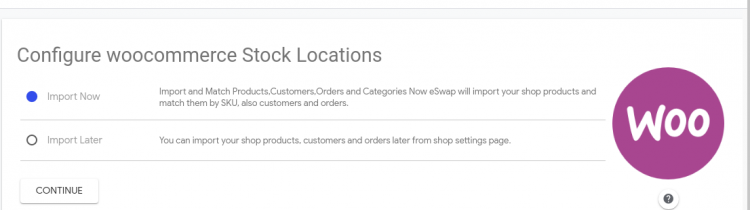
STEP 4
On this step, we ask you to import all your data and automatically sync matching products or you can manually import them later from My Apps -> WooCommerce page.
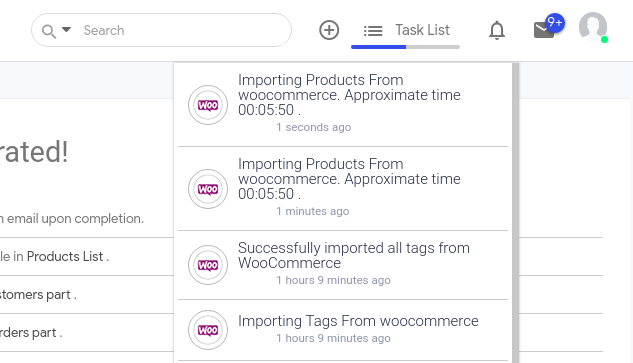
That’s’ all. On the top, you can see a progress bar that will show what we are syncing. You can do other processes until your WooCommerce channel will be fully integrated. We’ll email you and notify you in the notification section as well.
After installation, you can see how many products, orders, and customers are imported to eSwap.
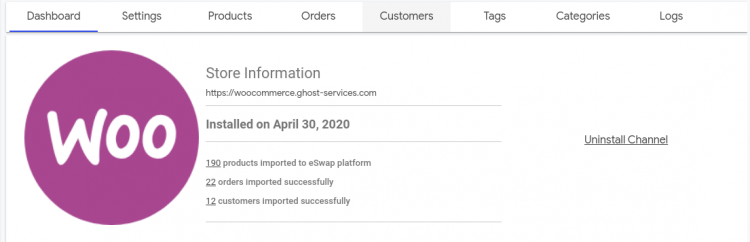
That’s all now your installation is complete!